Help, My Dog Is Limping!

Courtesy of: Ashley

In a previous blog I shared with you one thing that scared me about owning a Bullmastiff:  Bloat!  This is the second thing that gives me a fright:  Cruciate Ligament Rupture.

Ligaments are bands of tissue that connect bones to each other.  Cruciate ligaments (CLs) live in the knee joint.  These ligaments connect the femur (thigh bone) and tibia (shin bone).  These ligaments help the knee move backwards and forwards.

A normal knee

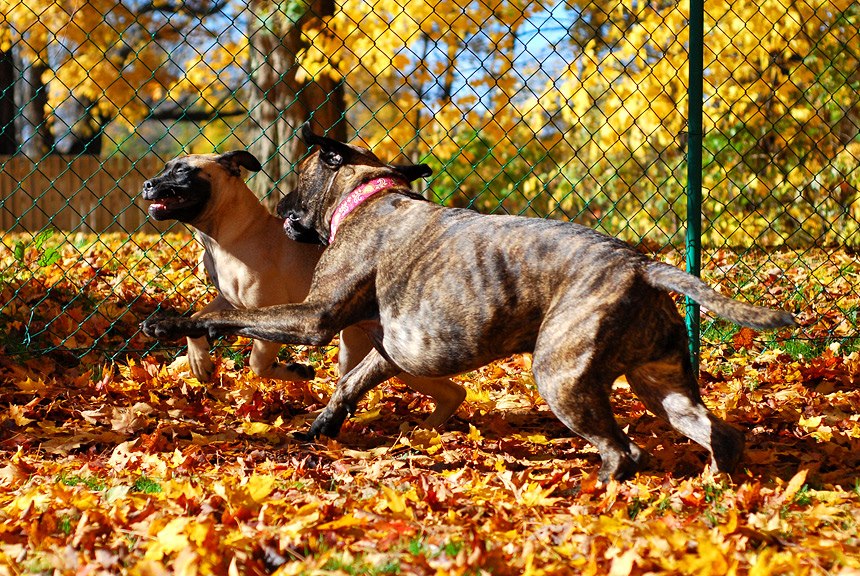
CL damage can occur when the knee twists in an unnatural direction.  Often times, a CL tear can occur when a dog is running, then stops to change direction.  The direction change twists the knee in a manner that the knee is not supposed to bend.  When the CL tears it causes pain and the dog becomes lame.  In most cases the dog is not weight bearing (limping) or will only toe-touch and the knee may appear swollen.  The dog may begin to use the leg again but will become lame again with time.

Monitoring your dog’s exercise routine can help reduce the risk of a CL rupture.  Larger or overweight dogs are more prone to this condition.  Making sure your dog is at an ideal weight and keeping larger breeds in a controlled exercise routine will help control the wear and tear on their joints.  Small breed dogs with a luxating patella (when the knee cap moves out of place) may be predisposed to rupturing a CL.

A veterinarian looks for “drawer” when diagnosing a ruptured CL.  By placing one hand on the femur and one on the tibia and manipulating the joint they can observe abnormal movement.

A veterinarian assessing drawer

Within a healthy knee there is very little movement in the joint but with a ruptured CL there is laxity in the joint and movement occurs.  With large or nervous dogs assessing for “drawer” can be difficult to accomplish.  In these cases heavy sedation may be needed to allow the veterinarian to manipulate the joint.  A veterinarian may want radiographs (X-rays) of the joint to see if there is arthritis present as well.  A radiograph can help to confirm the diagnosis of CL rupture.

There are different ways to treat a ruptured CL.  Factors that influence the choice of treatment are the size of the dog, if the rupture was a complete or partial tear, and the dog’s home environment.  If the CL was completely ruptured, surgery is recommended.

One surgical method to correct the rupture is called “extracapsular repair.”  In this method, a strong suture material (cruciate line) is used to create an artificial ligament.

Extracapsular Repair

The torn ligament is completely removed and the cruciate line is placed from the outside lower portion of the femur to the inside upper portion of the tibia, which acts like a brace within the knee.  After this surgery the dog must have very strict rest for 8 to 12 weeks.  The dog’s activity is restricted, with only activities such as leash walking and (eventually) swimming permitted.  The veterinarian will guide the owner with appropriate activities for the dog as the healing progresses.  During the healing time the instructions given by the veterinarian should be followed precisely to prevent further injury.  This method of surgery is performed here at Truro Vet.

Another surgery commonly performed is called Tibial Plateau Leveling Osteotomy (TPLO).  This surgery is recommended for dogs weighing more than 50 pounds or in dogs with poor conformation (ie: Bulldog).  The purpose of this surgery is to correct the angle of the tibia in relation to the femur, to stop the femur from being able to move in an abnormal direction.  The veterinarian cuts a portion of the tibia and rotates it before reconnecting it with plates and screws.

TPLO plates

This surgery is more challenging to carry out but usually generates a faster return to normal function.  TPLO surgeries are referred by our veterinarians to specialists in this type of procedure.

In select cases, medical treatment may be chosen in lieu of surgery.  Circumstances include:   the CL is only partially torn; the dog has other health conditions; the dog’s age or other health conditions present a risk for anesthesia; or the owners cannot keep the dog quiet for the 8 to 12 week healing period.  The veterinarian will discuss restricting the dog’s exercise to activities like leash walking or swimming.  If the dog is overweight, weight loss and low calorie diets will be discussed.  Frequently anti-inflammatory medications are used to reduce pain and inflammation.  Products containing glucosamine and other joint health supplements may be added to the dog’s diet.

If a CL rupture is not treated, severe joint deterioration usually occurs.  Arthritis sets in and the dog will usually compensate by putting more weight on the other leg causing that ligament to deteriorate and possibly tear.  Without treatment you also run the risk of the dog experiencing chronic pain.

If you would like more information on risk factors for CL ruptures or you are worried your pet may be experiencing this condition, please contact the office at (902) 893-2341.

Hugo and Brenley


A Social Puppy Is A Happy Puppy!

Courtesy of: Kaila

Did you know that socialization is one of the most important things you can do for your puppy?  It is also the first step in raising a well-behaved dog.  Proper socialization involves exposing puppies to as many new people, animals, stimuli and environments as possible during this time.  It should be done safely and without causing over­stimulation manifested as excessive fear, with­drawal or avoidance behavior.  The crucial time period for socialization with your puppy is the first three months of life.  Socializing your young puppy well means there is a better chance your puppy will be calm and accepting when he experiences these same stimuli again later in his life.

A dog that has not been socialized may become an epicenter in a storm of problems.  Some dogs may even become sick from stress, which can inhibit your ability to train them.  They can shed excessively and develop long-term health issues.  Stressed dogs can be aggressive, unpredictable, and unmanageable, all of which may lead to a dog that bites. Therefore it is very important that you make socialization a priority in your training. Turn each opportunity of meeting someone or something new into a positive experience that results in treats, toys and fun!

A Happy Play Date!

Here at Truro Vet we offer a FREE Socialization Class every Thursday night at 6pm.  We call it a Puppy “Party”.  These classes are drop-in supervised one hour play sessions designed to help young puppies learn valuable play skills.  Equally important, puppy owners learn the basics of dog body language.  This should be considered a good addition to enrollment in a well-run puppy class, not a substitute for classes.

Puppies must be under 16 weeks of age the first time they attend and must have had at least one set of core vaccinations one week prior to attendance (including Distemper, Parvovirus and Bordetella).  Puppies are exposed to a number of novel things to accustom them to a new environment and owners learn when and how they need to intervene in play.

You don’t have to be enrolled in other classes or be a client of Truro Vet in order to attend our Puppy Parties.  We want this important first step toward a well socialized dog to be available to everyone.  We also offer Puppy Classes which will continue to give your puppy great socializing opportunities. Here are a few other tips to help you out on your own:

  • Give a treat to each person that your puppy will meet and ask them to give it to your puppy.
  • Expose your puppy to lots of strange sights, sounds and situations.  This will help them get comfortable and familiar with them.
  • When you bring your puppy to class we can supply you with a socialization check list that has a variety of ideas.

If at any time during socialization the puppy becomes frightened (tries to run away, tucks his tail underneath flat against his belly, or attempts to snap at you) consider the following:

  • Do not coddle a frightened puppy. Unknowingly you are praising his uncertainty; he will feel as though there is something to be unsure about. This will worsen the situation.
  • Jolly him up with a silly voice, a treat or game.
  • If a situation is overwhelming to the puppy, back away until the puppy is relaxed again.
  • Start from this point and build up the pup’s confidence.
  • Gradually get closer to the stimulus that is causing the puppy discomfort.
  • Your ultimate goal is for your puppy to be confident and comfortable around stimuli that was previously scary to him.

Over time you and your puppy will become experts at meeting new people, seeing new sights and hearing strange sounds.  For more information or to sign up for classes, please contact us at 893-2341.

A BIG New Stimulus!


The Cone Of Shame!

Courtesy of:  Brea

It’s all fun and games until someone ends up in a cone!

“What on earth is that?”

“Why is your dog wearing a lamp shade?”

“Hey look, here comes cone head!”

Actually, the technical name for this contraption is “Elizabethan Collar” (e-collar for short).  While they do look bizarre, they serve a VERY important purpose.  E-collars are used to prevent your pet from biting, licking or scratching at their healing wounds.  Most commonly, they are sent home with a patient after they have been spayed or neutered.  This was the case with my lovely little fur child, Cooper.

Cooper, (aka “Coopy” and often called “Loopy”) is my crazy 11 month old German Shorthaired Pointer.  For those of you who are not familiar with the breed, they are very versatile all-purpose hunting dogs.  They are extremely energetic dogs who love to run and never seem to get tired.  The very thought of trying to keep this dog quiet for 2 weeks after his neuter seemed impossible!  But of course, it had to be done.

On January 9th, Cooper was neutered.  The operation went smoothly, and soon enough he was ready to roll again.  He didn’t seem too concerned about his little incision, so we didn’t bother with an e-collar at first.  If he started to pick at it, I would simply tell him “No” and he would stop. What a good boy!  As the days went on, I began to notice the incision site looked irritated and wasn’t healing as fast as I had hoped.  I started to spy on him and realized he was licking when I wasn’t watching!  One of our vets looked at him the next day and believed he was reacting to the suture material.  She prescribed some antibiotics and the dreaded cone.

Cooper's first cone

For most dogs, e-collars work great.  They are simply unable to reach the area and the wound is able to heal properly without infection.  However, that was not the case with Cooper.  I would catch him bending the cone so he was able to lick himself!  We even used the largest size cone available here with the same result.  This dog is smart and flexible, and has a long nose which makes things very difficult.  Since the cone wasn’t working for him, we tried bitter spray on the incision.  The horrible taste should deter him from licking, right?  Again, for most dogs, it works well.  Clearly Cooper didn’t think it tasted all that bad, because he continued to lick!

I felt like I was running out of options. It has now been almost a month and no improvement. Not only that, but keeping a dog who is used to running off leash everyday calm and quiet is not an easy task.

I also tried:

-Underwear             -T shirts            -Long sleeved shirts        -Children’s pants
-Leggings                  -Band-Aids

Cooper's stylish underwear

These are all great ideas, but not ONE worked for this dog!

Now this is where I start to brag about how awesome my co-workers at Truro Vet really are.  Since NOTHING else was working, they developed Cooper a custom made cone.

Cooper's new cone!

As you can see, it’s a giant ice-cream container with an e-collar attached to the top, complete with padding around the bottom, and loop holes to string his collar through.  The fact that he tolerated this contraption so well made it a lot easier.  I guess he had to get used to it, since it was on him 24/7 for a few weeks. Yes, even when he crawled into our bed at night…under the covers!  This amazing contraption is the reason why Cooper is now 100% healed!

Cooper cuddling

Every pet is different.  They all react to situations in different ways.  Some ideas will work great for one pet and not at all for another.  If nothing seems to work…don’t worry.  Give us a call at 893-2341.  We will be happy to put our heads together to help you find something that works for your pet!

endpic


Bloat – An Ounce of Prevention Can Be Worth…A Life!

Courtesy of: Ashley

What scares me about owning a Bullmastiff?  BLOAT! (well, and a cruciate ligament rupture but that’s a blog topic for another day).

Bloat (also known as Gastric Dilatation Volvulus or GDV) is a life threatening condition for which large and giant breed and/or deep-chested dogs such as the Bullmastiff, Irish Wolfhound, Great Dane, Irish Setter and Bassett Hound are at risk.  Bloat is when the stomach fills up with gas causing the pet to have discomfort and difficulty breathing.  When the stomach is full of gas it makes it easier for the stomach to twist around itself causing a gastric torsion.  A torsion cuts off the blood supply to the stomach and causes it to die.  When the twist occurs the life of the pet is at risk.

This condition is very serious and can be fatal if not treated as soon as possible by a veterinarian.  Often times a stomach tube is placed to relieve the gas buildup.  If that is not possible a needle is placed through the abdominal wall to relieve the pressure.  Once the pet is stable, surgery is needed to untwist the stomach.  At that time the veterinarian may discuss a procedure called gastropexy to help prevent future bloat.  This procedure involves tacking the stomach to the abdomen wall, to reduce the chance that the stomach may twist.  In at-risk breeds, these procedures are commonly done as a preventive at the pet’s spay or neuter time.

Understanding the early signs of bloat can be very beneficial.  Abdominal distention, vomiting or retching, restlessness, drooling, panting and shallow breathing are all signs that you should contact your veterinarian immediately.

The most common time for bloat to occur is two to three hours after a meal that has been followed by exercise.  Dogs should be fed two or three times a day rather than once a day to limit the volume of food in their stomach at any one time.  Limit the access of water after a meal and limit exercise and excitement before and after meals for one to two hours.  Dogs that are more likely to get bloat should be fed in a quiet location and if a diet change is needed it should be done at a slower rate over a period of at least five days.

Hugo and Brenley (you met Brenley in the nail trim blog), our Bullmastiffs, are watched very closely all the time but are especially not allowed outside off leash for at least one hour after meals to help prevent bloat.  Knowing the early signs can be life saving for your pet!

If you have any questions about bloat, or any other diseases large and giant breed dogs are susceptible to, please call us at 893-2341.


It’s The Most…Hazardous? Time Of The Year

Courtesy of:  Carmen

It’s that time of the year!  Busy, busy, busy!  The parties are starting, the decorations are going up and a variety of foods are being baked and consumed.  The holidays are upon us.

During this festive time, many risks exist for our pets:

Those pretty poinsettias that decorate our homes so beautifully may be toxic when eaten in large amounts by our dogs and cats.

Poinsettia

Delicious chocolate to us may become toxic when eaten by our pets.  Depending on the percentage of cocoa in the chocolate, even a small amount can be fatal if untreated.

darkchocolate1

Turkey or chicken bones may cause obstructions or perforate bowels when consumed.

Chewing on Christmas electrical cords may cause burns to mouths or cause electrocution.

Tinsel, garland or ribbons may cause obstruction in the bowel, especially in cats who love to eat anything string-like.

tinsel

Tree decorations, in particular glass ones, can be a safety hazard – best to place them high on the tree.

Anchor that tree securely!

Watch those lit candles…they can be knocked over by curious pets, or cause burns if they get too close.  Keep them up and out of reach.

Candies wrapped in foil or plastic can be very tempting for pets, but may become lodged in the throat or cause obstructions in small pets.

candy

Raisins and grapes can have harmful effects on the kidneys in some pets.  Keep them away, just in case.

Alcohol left unsupervised may be ingested and cause discomfort for pets.

wine

Watch out for nut shells that can also get caught in throat or become impacted in bowels.

With a few precautions and planning we can all have a wonderful holiday.

Merry Christmas and a Happy New Year from all the staff at the Truro Veterinary Hospital!


Trimming Your Dog’s Nails – A Step-By-Step Guide To Success

Courtesy of:  Ashley

Lots of pet owners cringe at the thought of having to trim Fluffy or Cujo’s nails.  Maybe it’s the thought of having to dress up in hockey gear to protect yourself, or the thought of “quicking” your pet and making them bleed that intimidates pet owners. Either way, with some training, most pets will allow you to trim their nails without a battle or injuries (on either side of the clippers).

For this discussion of nail trimming in dogs, I’m going to share our experience of teaching our four month old puppy, Brenley, to allow us to trim her nails.

Sondra and I are very lucky!  Brenley LOVES food, which makes training her for this process much more enjoyable for all of us.  We use her food as treats but if that is not enough you may need to find a treat that is of very high value to your dog and use it only for nail trims.  Hugo, our other dog (you’ll meet him in a future blog), prefers cheese as his ultimate treat of choice and he only gets it for nail trims.

We are using two methods to trim her nails, the nail clippers and the dremel.

Brenley

Using the Clippers:

Teaching your dog a new behavior takes lots of time, patience and rewards.  Nail trimming, in particular, can be especially difficult because it can mean strange noises and staying still.  Below are the steps to help guide you and your dog in becoming a master nail trimming team.  Please take note:  depending on the individual dog these four steps could occur in a short (several minutes) or long (several days) time period.  Try not to push your dog too far past their comfort level; it’s better to take longer than you think you need to, than to do too much at once and risk causing your dog to experience unnecessary fear.

1.  We started off by handling her feet often.  Taking her paw in my hand, I placed my thumb above one toe and my index finger under the toe behind the pad.  Slightly pushing down with my thumb extended the toe nail out enough for us to see.  We started this procedure when she was sleeping, then when she was tired and lying down but not sleeping, and now we can do it while she is awake.  As we did this to each toe we were giving her treats, making sure she was enjoying the experience.

2.  Next, we introduced her to the nail clippers.  We started this procedure by letting her sniff and show interest in them.  As she did this we rewarded her with treats.

3.  Once she was comfortable with them, I started holding onto her paw in my non-dominant hand (in my case the left) and holding the clipper in my dominant hand (the right) while Sondra fed treats.  The more relaxed she became, the more treats she received.  Be careful not to give treats if your dog is pulling away as you would be reinforcing the undesirable behavior of pulling away.

4.  Once Brenley was relaxed and used to having the clippers near all of her feet, it was time to start trimming.  We started by trimming the tip off the nail.  By taking small amounts off at a time you are less likely to trim too short and cut the quick.

Trimming

Using the Dremel:

Like training your dog for the clippers, the dremel takes time, patience and lots praise and rewards.

1.  As in step one in “Using the Clippers”, we got Brenley used to having her feet handled with lots of food rewards.

2.  We next introduced the dremel by letting her sniff and show interest in it.  Once she was comfortable with having it near her we turned it on, using treats to reward her good behavior.

3.  Just like step three in “Using the Clippers”, we started holding her paw and the dremel at the same time.  Next we started touching the dremel to her nails without it turned on, then with it turned on.  We were careful not to treat at the wrong time, only when she was giving us a behavior we wanted.

4.  After Brenley was comfortable with step three, we proceeded to dremel her nails.  This involved grinding the nail tip, making sure to go slowly and take a little off at a time to ensure we weren’t getting them too short.

The dremel

The “quick” is the supply of blood vessels to the toe nail.

It is much easier to see in white/clear nails than dark nails.  If the nail is clear, the quick is the pink area inside the nail.  You want to trim the toenail to within a few millimeters of the pink part.  However, if the nails are dark and difficult to see, you will have to trim small pieces off at a time and look at the cut area.  The cut area will change from black to a grey the closer you come to the quick.  Stop trimming when you see grey coloration.

If you cut the quick on your pet and make them bleed, they will be okay, but it can be painful.  It may mean you have to go back a few steps to get your pet comfortable with the idea of having their nails trimmed again.  To stop the bleeding there are some household items in your pantry that can help.  Place a small amount of cornstarch or flour in a Kleenex and hold it to the nail adding pressure.  If you are unable to stop the bleeding give us a call and we can help you.

A clicker can come in handy when training your dog for trimming nails; it sure helped us with Brenley!  If you are not sure what “Clicker Training” is, stay tuned to one of Kaila’s blogs coming soon.

Some dogs have no problem with having their nails trimmed, while others take LOTS of time and patience.  If you would like a demonstration of everything I’ve written about, please call us to schedule an appointment.  Not all dogs will allow you to trim their nails.  Some are better without the owners in the room.  If you tried to trim your dog’s nails without success or you would just prefer not to do them yourself, please give Truro Vet a call (893-2341) and we can assist you.


To Brush Or Not To Brush?

Courtesy of: Kaila

I had worked at Truro Vet for almost a year when I got my puppy Indy, a Nova Scotia Duck Tolling Retriever.  By that time I knew EXACTLY all the things I was going to do to make sure that my puppy lived a long, happy and healthy life.  One of the health topics that stuck out most to me was dental care. I would see all sorts of dogs and cats of different ages and breeds and they all seemed to have the same issue at some point in their life – and that was bad breath. What simpler way to fix that than to brush your pet’s teeth!

Dogs (as well as cats) don’t often get cavities like humans do, but they are prone to plaque build-up, tartar and gingivitis, all leading to tooth issues and foul breath.  Keep in mind our dogs aren’t going to be the perfect little patients and “Say aaaahhhh” when your veterinarian asks when it comes time to clean those less-than-pearly whites.  A proper dental cleaning is going to require an office visit, pre-surgical bloodwork and for your pet to be put under anesthesia.  This is a very safe and common procedure but if you could delay the time between needing the dental work done – why not?!

So early on with my new puppy I started setting him up for success with this brushing thing.  It wasn’t a big concern right away because the teeth he had when I got him would fall out over the next few months, but I did want to have him ready for brushing by the time those adult teeth grew in.  I started with lots of handling of Indy’s mouth, getting him used to me holding his muzzle, and rewarding him with kibble and treats for not resisting.  I also would flip up his lips, and rub his gums with my finger.  In no time at all he was very accepting of this fun new “game” that resulted in him getting lots of rewards for being such a good puppy!

As he started to lose teeth I introduced the toothbrush and toothpaste, and again made it a fun “game” where he got to lick the yummy chicken flavored toothpaste off the end of the toothbrush or my finger.  We quickly built it up to him letting me peel back those lips like we had practiced many times before and now brushing his teeth with the brush.

I wanted to make Indy’s teeth brushing part of my daily routine with him so believe it or not – his tooth brush and toothpaste sit in the bathroom next to mine.  Every night after I finish brushing my teeth I brush his (and am very careful not to mix up the toothpaste – as I am not a big fan of brushing my teeth with beef flavored toothpaste!).  It is like his “bedtime” snack, and he is very used to this routine.  I have had Indy in my life for over 4 years now and have been brushing his teeth every night and we always get compliments on his gleaming smile as you can easily see from the picture below.

Photo courtesy of Photographer Robert MacLellan (see more great work at robertmaclellan.viewbook.com)

Brushing teeth can have beneficial effects even when you don’t start with a brand new puppy.  If you have questions about brushing or other dental care, please contact Truro Vet at 893-2341.  With a little work, your pet’s smile can be as big and bright as Indy’s!


Cushing’s Disease – The Scoop On Sparky

Courtesy of:  Dr. Michelle

Our last Facebook contest gave you the opportunity to guess what disease our 12 year old fictional dog Sparky had.  The correct answer was Cushing’s Disease (also known as hyperadrenocorticism, or HAC).

HAC is a disease involving an excess of one or more adrenal gland steroids, most commonly cortisol.  We tend to see this disease most commonly in older dogs over 6 years of age.  There are many clinical signs to watch for including: drinking more than normal and therefore urinating more than normal (which can also be a sign of diabetes or kidney disease), excessive hunger, a distended belly, panting, thinning or loss of fur, and oily skin.

In order to diagnose HAC, we start with some basic blood work.  The most common finding of these tests is an elevation of alkaline phosphatase (ALP).  This enzyme, which is normally found in the Iiver, may be elevated in either liver disease or when there is an excessive amount of steroids in the bloodstream (as is the case in HAC).  The next step in the diagnosis of HAC is to do one of two tests: an ACTH stimulation test or a Low Dose Dexamethasone Suppression test.  Depending on the clinical signs and blood work results of the individual dog, the doctor may choose to do either of those tests.

Once a diagnosis of Cushing’s disease is made, treatment will be started.  The most common treatment is a pill called Trilostane (Vetoryl).  This drug inhibits cortisol production at the level of the adrenal gland, therefore reducing clinical signs associated with the disease.  There are also drugs which partially destroy the adrenal gland and are only indicated in certain cases of HAC.  Other more drastic treatments such as surgery or radiation therapy may be needed in very rare instances.

After beginning Trilostane, a follow-up ACTH stimulation test is performed one month later, and the dose of the medication is adjusted as needed.  We recommend repeating an ACTH stimulation test every 3 months to make sure that the cortisol level in the dog is not dropping too low which can lead to an emergency condition called an Addisonian crisis.

Dogs can live a long and healthy life after being diagnosed with HAC.  If your dog is experiencing any of the symptoms that Sparky was showing, please give Truro Vet a call at 893-2341.


Anna Belle’s Yucky Breakfast

Courtesy of:  Valerie

It is 5 am on a wet and foggy morning and I am walking around our yard with our new rescue puppy Anna Belle.  Anna Belle is a black 5 month old Chinese Shar Pei who came to us not knowing a few things and housetraining is unfortunately one of them.  This is why I am standing in my yard in my PJ’s wearing my green rubber boots and a big warm coat with a pocket full of treats.

After Anna Belle “does her business” she gets rewarded with a kibble.  This time our coordination is off and she loses it in the grass.  I have two other dogs in the house with allergies (you will meet them in another post) so I bend down right away to retrieve it.  To my horror and disgust, what I thought was an innocent piece of kibble in the grass is actually a slug!  Yuck!!  The more that I look around the yard, the more slugs I see.  The worst part is realizing that when my dogs are out munching on the grass as they often do, they are likely getting some extra protein from the slimy slugs!  Ugh…it gives me the shivers just to write that down!

Not only are slugs gross, but in Atlantic Canada slugs and snails can carry Fox Lungworm (Crenosoma vulpis).   Foxes carry the lungworm and shed larvae in their feces, which the slugs eat.  When dogs then eat the slugs, they can become infected as well.  The main sign of lungworm in dogs is a persistent cough.  Thankfully the cough can be treated easily with several veterinary products.  If you are concerned about lungworm in your dog, contact Truro Vet at 893-2341 for more information.

As I make my way back to bed, I relax knowing that my dogs are on a preventative deworming schedule that works on lungworm, but I need to seriously reconsider those sluggy doggy kisses!